Wednesday, December 15, 2010

My Holiday Spiced Wassail


"Here we go a wassailing, among the leaves so green!..."  Wassailing, like in this song, is an old English tradition similar to the Christmas caroling we do now.  Wassail, the drink, is also an old "Yuletide" tradition that dates as far back as Medival times.  Although some modern recipes call to make it with a base of wine or fruit juice and apple or orange slices, historically it basically is a mulled cider with sugar and spices.
    
The recipe that I came up with is a mixture of both.  It is non-alcoholic (family friendly) that starts off as a base of delicious apple cider with some tart cranberry and sweet orange juice.  Then, I add all of the Christmas-time aromas and spices like brown sugar, cinnamon stick, cloves, allspice, and a bit of nutmeg!  MmmmMmm!  I finish it off simmering away with a sliced clementine orange and a few fresh cranberries!  This adds to the flavor and makes it look beautiful!  The cranberry juice gives the drink a pretty red hue that's perfect at Christmas--I love cranberries this time of year!

This is the perfect party drink that will warm you up from the inside out!  I made it for our Cookies and Cocoa party, and it was a bigger hit than the hot cocoa!  When family and friends arrive, your house will smell like you just took an apple pie out of the oven!  Sometimes, I will just make a small pot of it for just my husband and I to enjoy while watching a Christmas movie.  It makes the night feel extra special.  I think it would be a perfect drink to come to make after an evening spent caroling the neighborhood.  Whenever you decide to make this festive drink, just be sure to keep all of those special memories close to your heart! These are the times that we cherish and will look back on with joy!

                             I just want to wish everyone a very
                        Merry Christmas and a Blessed New Year!


Holiday Spiced Wassail

In a large heavy bottom sauce pan, pour in 8 cups of apple cider (not juice here), 4 cups of Cranberry juice and 2 cups of no-pulp orange juice.  Turn the burner on medium low heat.  Add in about 3-4 heaping Tbsp. of brown sugar, 3 cinnamon sticks, 5 cloves, a couple dashes of ground allspice, and a pinch of nutmeg.  (I used fresh nutmeg this time since a good friend gave me one of her's.) Add at least 2 slices or orange and a few fresh cranberries, if you have them.  Simmer until very warm.  I like for it to be on the heat at least 30 minutes before serving, so all of the flavor marry together.  Strain the spices, before serving, if you do not put them in a cheesecloth bundle.  (I have made it both ways.) Serve in mugs and garnish with an orange slice or cinnamon stick and cranberries.

Grocery List:
Apple Cider
Cranberry Juice
Orange Juice
Brown Sugar
Cinnamon Stick or Ground Cinnamon
Whole Cloves
Ground Allspice
Nutmeg (optional)
Orange slices
Fresh Cranberries

Monday, December 13, 2010

Frosty Lemon Cupcakes

 
     We just hosted our 3rd annual Cookies & Cocoa with the Cates' party on Saturday.  It's something that we look forward to every year--having my husband's med students friends (and mine!) over for a Christmas dessert party.  This gives me the chance to bake whatever yummy confection I want to, and that's just what I do!  This year so many friends came, and I made so much food, so it was a huge success!   The menu included my Christmas Linzer Cookies, Frosty Lemon Cupcakes, Coconut Macaroons (some with drizzled chocolate), Candy Cane Bark, Assorted Chocolate Dipped Pretzel Sticks, Frosted Sugar Cookies, Chocolate Truffle and Hazelnut Truffles, Chocolate dipped Marshmallows, Homemade Hot Cocoa, and Hot Spiced Wassail!!!  Yes,  I made everything!  It was a blast to be able to have fun in the kitchen and bake for days.  One of mine and Heath's personal favorites are the Frosty Lemon Cupcakes.  This is a very simple recipe that come from the "famous" lemon cake Mom makes every Thanksgiving.  The base is just a box cake mix that is all dressed up for the Holidays!  I'm not sure I made these cupcakes quite as ridiculously moist as her cake, but they were pretty darn tasty to me!  They actually became our breakfast the next morning, too!

     If you are a lemon lover, then you will die over these!  Moist lemon cake that is doused in real lemon juice with a beautifully frosty, sweet glaze that run off the top and down the sides of these baby cakes!  What's not to love?!?  Also, I really appreciate the simple elegance of these cupcakes.  The taste is just pure, sweet lemon without any heavy icing, and the appearance is lucious without being over-done.  Mom and I like to use fresh cranberries to garnish and decorate the cupcakes/cake.  I think the red of the cranberry really pops against the pale yellow, and it's just perfect for Christmas!  This recipe is a much loved tradition in my family that's here to stay.  I'm excited to share it with you!


Frosty Lemon Cupcakes

Grocery List:
1 Box Lemon cake mix
Eggs
Canola oil
2 large lemons
Powdered sugar

Prepare 2 muffin pans with liners. 
Prepare the cake batter using the directions on the box.  Bake them using the directions on the box. 

(This is the part where Mom makes them really good!)-- Take them out of the oven and out of the muffin pan onto a cooling rack. Allow to cool about 5-10 minutes before taking a toothpick and poking several holes in the top of each cupcake.  Squeeze into a small bowl, the juice of about  1 lemon.  (about 2 Tbsp)  With a spoon, pour the lemon juice all over the tops of cupcakes.  This will sink into all of those tiny holes of the warm cupcake and will completely drink all of this yummy juice!  This makes the lemon cake taste just a little bit tart and give it a very real lemon flavor.  The more juice you put in, the more moist and delicious they will be! 

Squeeze all of the juice out of the other lemon into a bowl.  Add enough powdered sugar to make a thick glaze consistency.  Pour about half of this mixture over the cupcakes while  they are still warm.  This will soak in a bit and drip down the sides.  Beautiful!  Whenever the cupcakes cool, pour the second half of the glaze and spread around the top. It's okay if it drips a little.  This second glazing will seal in all the moisture, give them that frosty look, and will make them taste perfectly sweet!  Soooo good! Allow to cool (if you can!) and enjoy with a tall, cold glass of milk or hot coffee!

Tuesday, December 7, 2010

Christmas Candy Cane Bark

                                                            
                                           Merry Christmas!!!
     It's not Christmas at my family's house without (peppermint) candy cane bark!  Mom has been making this easy and divinely sweet candy since I can remember.  As a child, I would make it with her and we'd eat it along the way!  I loved to help her break the bark apart once it had cooled.  (It's quite fun to make!)


If you haven't had it before, it's basically crushed candy cane in creamy white chocolate.  Yes, I said easy.The bright flavor of the peppermint candy cane and the rich white chocolate is a simply perfect combination.  It actually looks beautiful with the pinkish red bits of candy cane throughout the ivory chocolate bark. This is the perfect treat to put in a pretty Christmas tin and give to a friend, teacher or neighbor not only for the taste, but because it stores and travels very well.  It will actually stay fresh for 2-3 weeks!  What a perfect treat to have around and nibble on with coffee or drop into your mug of hot chocolate for a special Christmas twist!  I had to post this recipe to share with you our tradition, and let you know that not all candy is difficult to make.  Happy candy making! (Oooo! If you like this recipe, you'll love my Toasted Pecan Turtles!)


Christmas Candy Cane Bark
1 pkg. white candy bark
1 cup white chocolate chips
6-8 candy canes (as much peppermint as you like)
Using a sharp knife, break up the white candy bark so you won't have trouble melting it.  Put in a glass bowl, and microwave in 30 second intervals, stirring in each time, until almost melted all the way.  Add the white chocolate chips and stir well.  Then put back in the microwave for 30 seconds, take out and stir until very smooth and creamy.Crush your candy canes by placing in a heavy duty freezer bag and I usually using a rolling pan to crush the candy cane into both large and fine bits.  This takes a little effort, but well worth it!  Once crushed, stir in most of the crushed candy into the melted chocolate, leaving about 3 Tbsp.  Once it's all well incorporated, pour it onto a sheet pan covered in aluminum foil and spread out.  Take the remaining crushed candy cane and sprinkle over the top.  Pop into the fridge for about 15 minutes, or until set.  It will easily peel off the aluminum foil, and then have fun randomly breaking it up!  You want it to look like "bark".  Store in a storage bag or tin.  Enjoy!


Thursday, December 2, 2010

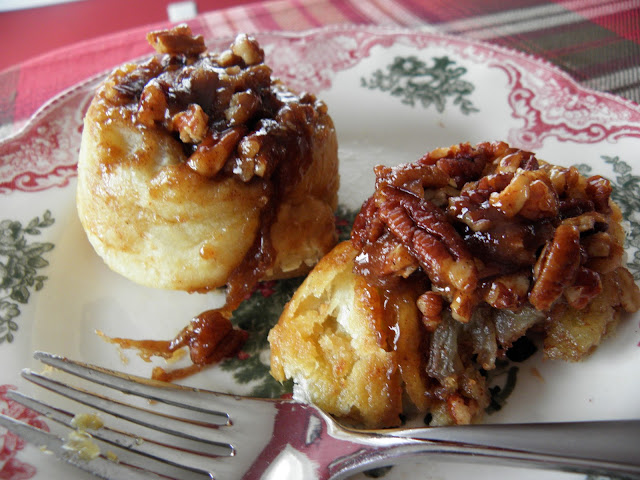
Incredibly Easy & Perfectly Delicious Sticky Buns


Attention, anyone who has a near-sinful sweet tooth (Me!!) or would love to welcome loved ones with an impressive breakfast treat that's way easier than anyone would believe!?!! This sticky bun recipe is perfect for you!  Honestly guys, if I could label some of my recipes according to "my favorites", this would most definitely be one of them! 

I made these puffy, buttery, sticky-sweet treats for the first time on New Years Day morning 2010 whenever we had some dear friends over for a festive breakfast.  Whenever I saw this recipe in The Barefoot Contessa's Back to Basics cookbook (that I got last Christmas), I knew that these would be the right way to ring in the New Year!  Let me just say that they were a hit!  They are just as easy to make as the recipe seems; and  whenever you take these beautiful little jewels out of the oven, your kitchen will smell like an Amish bakery!  I think the combination of the easy, yet so yummy, puff pastry dough and all the sweet molasses-flavored brown sugar with a hint of cinnamon makes this a treat that's perfect for breakfast, dessert, or with your afternoon coffee or tea.

 First off, if you have never used puff pastry before, you will want to after this!  You can find it around the pie crusts in the freezer section of the grocery.  It's very easy to work with;  just remember to allow time to let it thaw (about 40 minutes). In this recipe all you do is literally unfold it.  That's it!  There is no need to get out the rolling pin or do a lot of fussing.  This pastry is remarkable how it will puff and rise and get tender and flaky. The puff pastry is really what allows this sticky bun recipe to be so simple!  I didn't use raisins in mine because my husband isn't a big fan of them, but I think they would be delicious in there.  Another good choice might be dried cranberries or candied ginger.  Be sure and follow the directions whenever it says to bake them in the muffin pan sitting on a parchment paper-lined cookie sheet.  That way none of the bubbling goodness with make a mess in your oven.  After taking them out of the oven, allow to cool for only about 5 minutes, and then turn them out on that same parchment paper.  You can store these under a cake dome for the day, or in a Ziploc bag for longer.  They are great hot or room temp.  I mean how bad can butter, brown sugar, cinnamon, and flaky pastry be?!  -- I thought so, too.
 
Today is my husband's birthday, and I decided to surprise him with these hot out of the oven whenever he woke up.  He was thrilled! So we enjoyed sitting at the kitchen table overlooking a frosty, Christmas-y looking morning with our vanilla coffee and sticky buns.  There's no better way to say "Good morning" to the Loves in your life!

Sticky Buns
Makes 12

12 Tbsp. (1 1/2 sticks) Butter, at room temperature
1/3 c.Brown Sugar, lightly packed
1/2 c. Pecana, coursely chopped
1 pkg. (2 sheets) Frozen Puff Pastry

For the Filling:

2 Tbsp. butter, melted and cooled
2/3 c. brown sugar, lightly packed
3 tsp. ground cinnamon
1 c. raisins, optional

Preheat oven to 400 degrees.  Place a 12 cup standard muffin tin on a parchment paper-lined sheet pan.

In the bowl of an electric mixer, combine the 12 Tbsp. butter and 1/3 c. brown sugar.  Place 1 rounded Tbsp. of the mixture in each of the 12 muffin cups.  Distribute the pecans evenly among the 1 muffin cups on top of the butter and sugar mixture.

Lightly dust a wooden board or counter top with flour.  Unfold one sheet of puff pastry with the folds going left to right. 

Brush the whole sheet with half the melted butter.  Leaving a one inch border around the edges of the puff pastry, sprinkle each sheet with 1/3 cup of brown sugar, 1 1/2 tsp. cinnamon and 1/2 cup of raisins (if you choose to use them.) Starting with the end nearest you, roll the pastry up with the seam side down. Slice the roll in 6 equal pieces, each about 1 1/2 in. wide. Place each piece, spiral side up in 6 of the muffin cups.  Repeat with the second puff pastry and to make 12 sticky buns.

Bake for 30 minutes, until the sticky buns are golden to dark brown and firm to touch.  Let cool for 5 minutes only, and invert the buns on parchment paper.  You can help ease the topping and pecans out onto the buns with a spoon. 
Eat and enjoy!

Tuesday, November 23, 2010

Toasted Pecan Turtles


     I'm on a dessert kick!  Told you I would be:)  This is one of the things I enjoy making for our family's Thanksgiving, although they are probably thought to be more of a Christmas treat.  When I think of homemade candies I usually think of Christmas time, but why wait?  Thanksgiving desserts are all about pumpkin and pecan and cranberry.  While I love those too, somebody has to bring some chocolate, right!?   Leave it to me.  These toasted pecan turtles are the combination of perfection.  They start off with pecans that have been toasted in the oven to bring out an even more nutty, fragrant flavor that is hugged by a dollop of creamy caramel and topped with velvetty semi-sweet chocolate!  They begin to slightly melt in your fingers as you bite into the chewiness of the caramel and chocolate, then find the crunchy pecan bottom. Yuuuummmy!

     These are an easy candy to make.  I don't go by an exact recipe, but I will walk you through it!  There is no way you can't love these pecan turtles.  Enjoy them this holiday season!


Toasted Pecan Turtles

Start off by toasting your pecans in a 350 degree oven for about 5-6 minutes.  All that you do is scatter them out flat on a baking sheet that not greased and put them in the oven.  They can burn quickly, though, so set a timer!  I used 3 pecan halves to one turtle and I made about two dozen turtles.  So I had 72 pecans or almost 1 1/2 cups.

Unwrap your caramels, place them in a glass bowl and add about 1/4 c. evaporated milk.  Microwave in 30 second intervals, stirring in between.  Once melted all the way, stir well until thoroughly combined.

So, lay out a sheet of wax paper on a large cookie sheet...or two small ones.  Important step: Butter these very well so the caramel won't stick.  You must do this, or else you won't be able to lift them off the pan!  Divide pecans on the sheet into groups of three, and put in a "Y" position.  This is the base for your turtle.  Next, pour some of the warm caramel over each pecan cluster - probably about a tablespoon each.  The amount of caramel isn't a big deal, as long as you divide it evenly among them.  Once you've topped them with the caramel, place the baking sheet in the fridge to allow the clusters to cool.

While they are cooling, take your semi-sweet chocolate & chocolate bark, chop them and put 3/4 of it in a glass bowl. (I usually do a ratio of a little more Baker's chocolate to chocolate bark, because it has a better flavor -- the bark helps it to set up better, though.)  Microwave in 25 second intervals, stirring in between everytime.  Chocolate will easily burn, and these intervals and stirring will prevent that.  Once mostly melted, add the last 1/4 of chocolate and put in the microwave once more.  Then stir it very well until the chocolate is perfectly smooth and shiny.

Take out the pecan caramel clusters and pour about 1-2 Tbsp. of chocolate over each one.  You may need to use the spoon to spread it around a bit, but you don't have to completely cover the pecans or caramel.  Once evenly divided, put back in the fridge to cool.  Store in an airtight container with wax paper in between.

Grocery List

pecans
1 bag of caramels
evaporated milk
Baker's semi- sweet chocolate baking squares
chocolate bark (chocolate candy coating)

Sunday, November 21, 2010

Chocolate Chip (Ooey) Gooey Butter Cake!

                                                Happy Thankgiving!  
  
     Thanksgiving and Christmas are my favorite holidays, because it starts with a time to reflect on the year and be so grateful to God for everything He has given us and then immediately begin to celebrate the birth of our Savior!!  It's such a wonderful Christ centered time of year, which I celebrate like I do any other joyous occasion-- with lots and lots of baking!  My kitchen becomes a cookie shop and sweet treats bakery until the New Year.  Let the flour dust fly and sugar buzz begin!

     We just had a couple of really great friends over for coffee and dessert fireside, and I decided to make these rich, gooey, buttery, sweet bars that are" best loved" in our household!  Just the name says it all: Chocolate Chip. Gooey. Butter (!) Cake.  Yowza!!  These yummy squares are so appropriate for Christmas because you will sing with the angels when you try them!  Yes, so I'm using a lot of explanation points (!!!) for this blog, but I'm so excited to share this recipe! Not only is this dessert a hit everytime, but it's incredibly easy to make!
   
     I would recommend using real butter for this recipe if you want a true buttery flavor.  You will use 2 sticks for this recipe.  Like my chocolate chip cookie recipe, this one has a lot of butter, and is worth every gram of fat. (I would also recommend a renewed gym membership post eating this.)  I used chocolate chip and chunks this time, but I've also made them without anything and they are absolutely amazing, too.  I wanted them to look a little extra decadent, so I drizzled  melted chocolate chips mixed with a bit of clear corn syrup (for shine) over the top after they had been out of the oven for about 20 minutes. When you first take the cake out it will be puffed up (shown in picture) like a cookie, and will then fall a bit.  This is a simple recipe that you will love to make and everybody will LOVE to eat! Please try this Gooey Butter Cake next time to satisfy your sweet tooth.  Enjoy your holiday baking!

Chocolate Chip Gooey Butter Cake


Crust
1 box butter-recipe cake mix
1 egg
1/2 c (1 stick) butter, melted

Filling
1 8 oz. pkg cream cheese, softened
2 eggs
1 tsp. pure vanilla extract
1 16 oz. box powdered sugar
1/2 c. (1 stick) butter, melted
1 c. chocolate chips
Preheat oven to 350 degrees.  Light grease a 9x13 in. baking pan.
In a bowl, combine cake mix, egg, and butter with an electric mixer.  Mix well.  Pat into the bottom of prepared pan and set aside.  Still using an electric mixer, beat cream cheese until smooth; add eggs and vanilla.  Dump powdered sugar and beat very well.  Reduce the speed of mixer and slowly pour in melted butter.  Mix well.  Stir in the chocolate chips. Pour filling onto cake mixture and spread evenly.  Bake for 40-50  minutes (it took me closer to 50 minutes).  You want to center to be a little gooey, so don't bake it past that point!  Remove from oven and allow to cool completely.  If you want to drizzle melted chocolate over the top allow it to cool for at least 15 minutes and then drizzle over.  Allow to cool for at least another hour and then cut into bars.  Enjoy!

Thursday, November 18, 2010

Sweater Weather Meat Loaf with Roasted Vegetables


Whenever I used to think of meat loaf, I would cringe.  I never thought too highly of the humble meatloaf, until I had it prepared this way at my husband's family's house.  I took my mother-in-love's recipe and added a few things to come up with a delicious one pot meal that now my husband and I just love to eat on a chilly day!

So this recipe is originally called Pot Roast Meat Loaf, because it is roasted in a pan with lots of beautiful vegetables just like a pot roast would.  I added what I had in my kitchen: carrots, potatoes, onion, and a more unusual addition of fresh green beans. I season them with salt, pepper, paprika, and basil, and then the meat loaf seasons them while cooking even more with it's yummy juices!  The vegetables make your meat loaf look even tastier whenever you take it out of the oven!  I love to cut my carrots on a bias for a little more elegance, but it will taste great however you chop!  After all, this is just a great rustic dish that you shouldn't have to fuss over. I like to have just a bit of a glaze on the meat loaf, so I came up with this simple one that's perfectly savory and sweet! You can add as much as your family likes.  You guys probably know by now that I believe you don't have to precisely stick to a recipe while cooking--but play around with it to satisfy you and your family's taste!

Hope you try this juicy recipe out sometime and enjoy Sweater Weather Meat Loaf with Roasted Veggies for yourself sometime. If you're like me, when the temperature drops outside and the fireplace is blazing inside, then it's time for comfort food!


Sweater Weather Meat Loaf with Roasted Vegetables

1 lb. lean ground beef
2/3 cup evaporated milk (or regular milk is great, too)
1/3 c. breadcrumbs
1/4 c. ketchup
1 tsp. salt
2 tsp. Worcestershire sauce (add liberally)
1/4 tsp. black pepper
3 medium potatoes, peeled and chopped
1 medium onion
3 medium carrots, peeled and sliced
dried parsley
dried basil
paprika
olive oil

Glaze
Mix together tomato sauce, brown sugar, Worcestershire sauce, paprika, salt and pepper.  This is a sweet and savory sauce.  You can add as much as you like to the meat loaf.


Mix in a large bowl: ground beef, milk, breadcrumbs, ketchup, salt, black pepper, and Worcestershire sauce.  Shape into a loaf in the center of a 9x13 in pan. 

Peel and dice the the potatoes and carrot and onion and toss together with greens beans, salt and pepper, paprika, basil and parsley with olive oil. 

Spread the vegetables around the meat loaf.  Sprinkle some basil over the meatloaf and drizzle a little olive oil over the top, as well.

Cover and bake at 375 degrees for about 50 minutes.  Uncover and add the glaze and bake uncovered for about 15 more minutes.  Turn on the broiler for the last 2 minutes to brown everything.

Tuesday, November 16, 2010

My Husband's Leek, Potato, & Baby Portabello Tart with Gruyère


     I love it whenever my husband takes the time to cook me dinner, but I have to say that this time he out did himself!  If surprising me with delectable autumnal spread is what he was after, then his mission was definitely accomplished!  It started off with a fresh, seasonal salad with dried cranberries, the next "course" was a beautiful curried butternut squash soup, then came the perfectly baked savory tart.  This tart was no ordinary entrée.  It was made with a homemade, buttery crust filled with a melody of leeks, potatoes, baby portabello mushrooms, and Gruyère cheese in a seasoned blend of eggs and goodness--Awe!  I am serious whenever I say this was a mouthwatering meal!  Oh, and I can't forget about the harvest apple crisp.  Every time I thought the next surprise couldn't get better, it did!


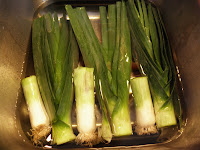
I have to share with you the recipe for the tart, because it's such a great dish if you're wanting to try something different, or it would be perfect as a breakfast or brunch item, too!  The crust was easy to make (so he says) and so worth the extra time. It's just right as a flaky, buttery bed for the filling.  Leeks are a great vegetable that I discovered last year.  They are in the onion family, but much more mild than a regular onion.  The way you clean them is soaking them in water and letting all of the sand they hold fall to the bottom of the bowl.  Then slice the leeks and soak them again in clean water to make sure they are very clean and ready to eat. (See in pictures.) Leaks and potatoes are a great marrying of flavors, and that's one reason why I love this dish so much!
This is a beautiful recipe and I'm so thankful for my wonderful husband to take the time to treat me to his cooking.  It was truly better than any restaurant--a perfectly cozy date night at home!  I love that man!!!


Leek, Potato, and Baby Portabello Tart with Gruyere


  • For the crust:
  • 1  cup  flour, plus more for rolling out dough
  • 1/2  teaspoon  salt
  • 1/2  teaspoon  freshly ground black pepper
  • 7  tablespoons  butter, chilled and cut into small pieces

  • For the filling:
  • 3 tablespoons butter
  • 1  cup  thinly sliced leek (about 1 large)
  • 1/4  teaspoon  black pepper
  • 1  medium peeled baking potato, halved lengthwise and cut into 1/4-inch-thick slices (~1 cup), boiled
  • 1/4  pound  baby portabello mushrooms (or any fresh mushroom), cut into about 1-in. pieces
  • 1  cup  fat-free milk
  • 1/2  cup  egg substitute
  • 1/3  cup  (1 1/2 ounces) grated Gruyère or Swiss cheese
  • 2  tablespoons  grated fresh Parmesan cheese
  • 2  teaspoons  fresh thyme leaves
  • 1  tablespoon  Dijon mustard
  • To make the crust: In a medium bowl, mix flour, salt, and pepper. Rub butter into flour until most of it looks like cornmeal but some larger, pea-size pieces remain. Drizzle in 3 tbsp. ice-cold water while stirring quickly with a fork. Or, pulse flour, salt, pepper, and butter in a food processor or blender until a coarse, cornmeal-textured mixture forms, then drizzle in ice water until dough comes together. Turn dough onto a large piece of plastic wrap and use wrap to press dough into a 1-in.-thick disk. Wrap in plastic wrap and refrigerate at least 30 minutes and up to 2 days.


Preheat oven to 375°. Lightly flour a work surface. Unwrap dough; with a rolling pin gently roll it, turning dough 90° between each roll, into a 12-in. circle.
Place rolled-out dough in a 9 1/2-in. tart pan. Trim edges flush with pan edges. Cover dough with a large piece of aluminum foil and weigh down with pie weights, dried beans, or uncooked rice.
Bake crust 20 minutes. Lift foil and weights off crust and bake until beginning to turn golden, about 10 minutes. Let crust cool to room temperature.
 Meanwhile, make filling: Melt butter in a large frying pan over medium-high heat. Add leeks and salt and cook, stirring, until leeks are soft, about 3 minutes. Turn heat to high and add mushrooms and potato. Cook, stirring constantly, until mushrooms have given off their liquid, 5 to 10 minutes. Spread leek mixture into prepared crust.
Place the milk, eggs, cheeses, thyme and mustard in a blender, and process until smooth. Pour milk mixture over leek mixture. Bake at 375° for 40 minutes; let stand for 10 minutes.

Saturday, October 23, 2010

Spice Rubbed Pork Loin Chops with Apple Cider Glaze


I came up with this autumnal recipe by combining two delicious recipes that came from one of my favorite magazines, Cooking Light. I cooked this on a whim, with the help of my husband, because I happened to have everything I needed already at the house.  I love keeping apples and apple cider around during the fall months, and it's a good thing, because this recipe is not only beautiful but unbelievably good! 

     We were surprised at just how much the flavor of the spices came out in the meat, which was perfect in combination with the sweet cider and honey dijon mustard glaze. When adding the cider to the pan, there was a sizzle and a huge cloud of steam that engulfed the pan!  Very dramatic and fun! Remember that if your cider cooks out before the sauce thickens, just add more cider to the pan -- you almost can't have too much.  I happened to find some fresh thyme that I added to the sauce after it reduced and thickened to a beautiful dark amber color.  I didn't let one drop of that go to waste!  The apples that I used were Jonathan apples, but, you could use other kinds of apple if you like.  Jonathan's are usually in season in the fall only.  Another thing to remember is to not stir the apple too much or they will fall apart and break down.  (They would still taste good, but not look as pretty as the half moon slices!)  I love using my cast iron skillet for recipes like this one--anytime I'm pan frying or searing meat it makes a beautiful crust on the outside and cooks everything very evenly.  I was impressed with the crispy sear that held in all of the yummy juices!

     Spice Rubbed Pork Loin Chops with Apple Cider Glaze is an amazingly good recipe, and is surprisingly easy to make!  It's easy to make, and the flavors are bold and very seasonal!  I served it with pecan, cranberry couscous and homemade sweet potato fries.  On a cool, fall evening this is the meal to enjoy!


Spice Rubbed Pork Loin Chops with Apple Cider Glaze 
    
     Mix together salt, pepper, ground coriander, cinnamon, and nutmeg in a small bowl.  About 1/2 tsp. salt, 1/4 tsp. pepper and ground coriander, and 1/8 tsp. cinnamon and nutmeg.  Rub this mixture on both sides of the pork loin chops.  Heat a large (preferably cast iron) skillet over medium high heat and swirl olive oil twice around the pan, and about 1 Tbsp. butter.  Add the pork and cook on each side for about 3 minutes each. When I turn the pork loin chops once, I turned down the heat just a little. You may be tempted to flip before the 3 minutes is up, but trust me and wait to get that great crust. Once the pork is cooked take out of the skillet and set aside. 
    
     Turn the heat down to medium and add 1 Tbsp. butter and about 1/2 cup of apple cider to deglaze the pan by scraping the yummy bits off the bottom.  Bits equal flavor!  Then add about one generous Tbsp. of honey dijon mustard to the pan and continue to stir. Add one sliced apple and gently stir in. Stir occasionally while it simmers. Place your pork loin chops back in the pan with the glaze during the last minute of cooking. It doesn't take long for the sauce to get  thickened and glossy.  Add as much salt and pepper as you like, and a few sprigs of fresh thyme. 
     Once the sauce is nice a dark and thick, and the apples are tender you can plate it up.  I placed the pork on a bed of the couscous and then spooned the sauce over the top with the apples.  It's beautiful this way, and the couscous soaks up some of the yummy sweet flavor from the apple cider and spicy flavor from the dry-rubbed pork!  Garnish with fresh thyme.

Grocery List
Pork Loin Chops
Salt
Pepper
Ground Coriander
Cinnamon
Nutmeg
Olive Oil
Butter
1 Apple
Apple Cider
Honey Dijon or Dijon Mustard
Fresh Thyme

Tuesday, September 28, 2010

Autumn is Here! Caramel Apple Cake


  Here's the recipe that practically defines what a perfect autumn cake should taste like--in my opinion.  The name says it all.  Caramel. Apple. Cake.  Honestly friends, this cake is one of  the very best cakes I've ever had! For a minute, just imagine with me what a homemade spice cake with freshly sweetened Jonathan apples and a smooth, ridiculously rich caramel frosting that pools at the bottom of the cake that is topped with toasted southern pecans would taste like! 

     The cake recipe is one that came from Heath's Nana and is a delicious no-fail cake that's made with the season's best apple, Jonathan.  It's usually made as a sheet cake with a cream cheese frosting, but I have been wanting to make my own version.  I just loved the idea of an apple cake with caramel frosting.  Apples and caramel have been the perfect fall pairing for as long as hayrides and festivals have been around.  So, I just though why not put them together in a cake that's so sinfully good it would satisfy any one's sweet tooth!


   Caramel Apple Cake would be perfect for an autumn birthday or even a new tradition at the Thanksgiving dessert table!  Try it, and I have no doubt you will agree it will be a recipe to share! 

Caramel Apple Cake
3 c. apples, chopped fine
1 1/2 c. sugar (Sprinkle over apples, set 15 minutes.)
1 1/2 c. all purpose flour
1 tsp. baking soda
1/2 tsp. salt
1/2 c. butter (1 stick), melted
3 eggs, beaten
1/2 tsp. cinnamon
1/2 tsp. allspice
1 tsp. vanilla
1/2 c. toasted pecans

Mix all ingredients together by hand.  Pour into 2 8 in. plans that have been greased and floured.  Bake at 350 degrees for 26-30 minutes.  Allow the cakes to cool and frost with homemade caramel frosting.  Decorate with toasted pecans.

Caramel Frosting
 1/2 c. butter, (1 stick)
1 c. packed dark brown sugar
1/3 c. heavy cream, or more as necessary
1 16 oz. box confectioner's sugar
1/2 tsp. pure vanilla extract

Melt butter in a saucepan over medium heat and stir in brown sugar and cream.  Bring to a boil and then transfer to a large mixing bowl.  Add sugar and vanilla.  Beat with a mixer until everything is creamed together well.  If the frosting is to thick, just add a bit of cream.  This frosting is very thick and rich, and once spread on the cake will actually smooth itself out for an beautiful finish.  Ice the cake once the frosting is cooled about 15-20 minutes, and re stir it before putting on the cake.

Wednesday, September 15, 2010

Creamy Potato and Corn Chowder


   As you may be finding out, I love to cook food that speaks of the season.  When the weather starts to cool off after a very long, hot summer I am practically grabbing at the opportunity to begin my fall meals.  I have been craving potato soup recently, but I wanted to make it with a twist.  This recipe was inspired by my love of potato soup, and the fact that I had some beautiful freshly frozen garden corn that I bought at a local farmer's market store.  So, I decided to do a take on creamy potato soup and rich corn chowder!  It was delicious! 

   The way I start most of my soups is with the aromatic of onion.  I usually saute with olive oil and in this case a little butter for richness and help the "roux" like base to come together. You can add whatever you else you like, like garlic or celery if you want. I will probably add some minced garlic the next time. Cooking is all about satifying your own taste, just make sure you practice before serving your guests the final recipe!  This recipe is written out rather casually because I didn't really measure any ingredients.  Like I said, use your Cook's intuition to help you out! This beautiful Creamy Potato and Corn Soup is delicious as summer takes a bow out to introduce my favorite season, Autumn!  (Better yet, enjoy eating this with a blanket and a movie!)


Creamy Potato and Corn Chowder

Chop about 4 medium sized potatoes into chunks. (I used red potatoes because that's what the farmer's market had, but you could use russets as well.) Dice about half of a sweet onion and 3 carrots into about the same size.  Pour some olive oil and a couple pats of butter into a dutch oven set on medium.  Once the butter melts, drop the carrots in and let begin to get soft, then add the onion. Salt and pepper a bit.  I like for these veggies to get very soft before the next step.  Then you will take enough flour to stir into the butter and oil to make almost a paste.  Stir this for a minute to get the bitter flour taste out.  The flour is a thickener for the soup.
 Once this is done, add about 2 cans of reduced sodium chicken broth and stir to break up the roux while scraping the yummy bits off the bottom of the pan.  Add the potatoes and frozen corn and bring to a boil.  Once it starts to boil, I turn down the heat a bit until the potatoes get tender.  They will soak up some of the yummy chicken broth flavors.
Once the potatoes are tender, add milk (I only keep skim milk, but 2% would make it even creamier) and if you want add a bit of cream for an even silky texture.  I didn't feel like mine needed any (not to mention we are trying to cut back on fat a little bit)! Then I add a good portion of salt, freshly ground black pepper, and dried thyme.  Fresh thyme would be amazing if you have some!  This goes so well with the potato and corn flavors.  Simmer together for a few minutes and ladle into bowls.  I served this with chedder garlic biscuits, and it was a match made in heaven.  Even just buttered bread would be dreamy!

Grocery List:
Red or Russet Potatoes
Frozen or Fresh Corn
Carrots
Onion
Garlic (Optional)
Olice Oil
Butter
Flour
Chicken Broth or Stock
Milk
Cream (optional)
Salt&Pepper
Thyme

Thursday, September 2, 2010

Peanut Brittle Topped Peanut Butter & Caramelized Banana Cream Pie

  
   Ok, so I'm on a bit of a dessert kick this summer!  I probably have the biggest sweet tooth of anyone I know (other than my husband), and I find baking so much fun and easy to share with you.  I mean, you can't have enough dessert recipes, right??  Here's a recipe that I was inspired to make after watching a yummy episode of Bobby Flay's Throwdown on the Food Network.  The challenge was banana cream pie, and both Bobby and the competitor's looked A-mazing!!  I have never even thought about making a banana cream pie -- and honestly it's never been a favorite of mine -- until I saw these recipes.  I decided to combine them and make my own divine version of Peanut Brittle Topped Peanut Butter & Caramelized Banana Cream Pie!

I have to start off by saying that this pie is quite a process to make.  It's a pie that you may not always have all of the ingredients on hand (like cream cheese, a box of vanilla wafers, and heavy whipping cream...oh, and make sure you have 6 eggs) so you will need to plan ahead when making this.  Also, there are several steps, that include several hours of refrigeration, so you may want to make the filling the night before or first thing in the morning in order to actually slice and eat the pie the same day.  Trust me, all of this preparation is well worth the wait!

The beauty of this delicious pie is in the layers.  The first being the homemade vanilla wafer crust, then some the layers of fresh banana slices that are overlapping right on top of the crust.  The next layer is "the" layer of caramelized banana custard that you have slaved over the stove top to prepare.  This dreamy, creamy layer is what truly makes this pie the banana goodness that it is.  The next layer of the peanut butter whipped cream/icing that makes this banana cream pie unique and rich tasting. The peanut butter tastes SO good with the banana flavor in the pie. (This is something I love so much I may add it to other pies or cakes!) The final layer, my personal contribution to the pie, is crushed peanut brittle all over the top to add a crunch that pairs perfectly with all of the creaminess!  Try this pie for a special occasion and you'll be glad I shared it with you!

Peanut Brittle Topped Peanut Butter & Caramelized Banana Cream Pie

*The Crust
3/4 of one box of Vanilla Wafers, crushed
1 stick of butter, melted
2 Tbsp. sugar

Combine together in a bowl until the butter is evenly distributed and the mixture looks like wet sand.  Pour in a large pie plate, and push down and around with the bottom of a flat glass or measuring cup. Or, you can  do what I did and press down with a slightly smaller pie plate to quickly and evenly spread the mixture in the pie plate and up the sides!  Then bake in a 350 degree oven for about 10 minutes.

*The Caramelized Banana Filling
1 1/2 tablespoons unsalted butter
2 1/2 tablespoons light brown sugar
3 very ripe bananas, peeled and sliced into 1/4-inch thick slices
3 cups milk
1/2 cup sugar
1 1/2 ounces cornstarch
1/4 teaspoon fine salt
6 egg yolks
1 teaspoon pure vanilla extract
1/4 cup cold heavy cream
Melt the butter in a large saute pan over medium-high heat, add 1 1/2 tablespoons of brown sugar and cook, stirring constantly, until the sugar is melted and the mixture is caramelized, about 4 minutes. Add the bananas and cook until bananas start to break down, and caramelize on both sides. Add 2 cups of the milk, bring to simmer and scrape the bottom and sides of pan and carefully transfer the mixture to a medium saucepan. Puree the mixture with an immersion blender until smooth; bring to a simmer.

In a bowl whisk the sugar, cornstarch and salt together until combined. Add the remaining 1 cup of milk and whisk until the cornstarch is dissolved. Whisk this mixture into the banana mixture and cook, whisking constantly, until the mixture thickens, about 4 minutes.Whisk together the remaining tablespoon of brown sugar and yolks in a small bowl until smooth. Ladle some of the thickened mixture into the egg mixture to temper the yolks. Pour the yolk mixture into the pot and cook until thickened, 3 to 5 minutes, WHISKING THE ENTIRE TIME. Once the mixture has thickened let it come to a boil for exactly 1 minute, whisking a few times. Remove from the heat,wisk in the vanilla and strain through a coarse mesh strainer into a bowl.

Cover the surface of the custard with plastic wrap and chill in the refrigerator until set, at least 4 hours and up to 12 hours. Once pudding is set, whip the custard in the bowl of a stand mixer with a whisk attachment on high speed until smooth, about 20 seconds. Add the heavy cream and whip until light and fluffy, about 20 seconds longer.

Transfer the filling into your cooled pie shell. Place plastic on top and let chill in refrigerator for at least 2 hours. 

*Peanut Butter Whipped Icing
3 oz. cream cheese, room temperature
1/2 c. powdered sugar
1 tsp. vanilla extract
1/3 c. creamy peanut butter (do not use freshly ground)
2/3 c. chilled heavy whipping cream
Peanut Brittle, coarsely chopped

In a large mixing bowl, whip together cream cheese, and powdered sugar until creamed.  Add the vanilla extract and whip in.  Next, add the peanut butter and mix together well.
In a separate medium mixing bowl, beat the heavy whipping cream on high, until firm peaks form.  Once you have made the whipped cream, gradually add it to the peanut butter-cream cheese mixture, folding it in.  Be careful to not stir this together too roughly, because you want to maintain the integrity of the whipped cream in the topping.
You will spread this evenly over the top of the filling in the pie pan.  Top with as much crushed peanut brittle as you like!

Friday, August 13, 2010

Sugar Laced Cherry Pie


I love the classics!  "Gone With the Wind", "It's A Wonderful Life", "The Sound of Music", Audrey Hepburn, Louis Armstrong, Dean Martin ---- buttermilk fried chicken, turkey and dressing, sweet potato cassarole, and of course cherry pie. Classics are all-time favorites that are enjoyed even more as the years go by.  They are passed down from generation to generation and  loved even more.  Cherry pie has to be one of those things.  Made from scratch, cherry pie (well, semi-homemade, if we're talkin' crust) to me is definitely a feel-good dessert that will "take you back" to a more simple era.  The taste of the sweet filling in a sugary crust will leave you feeling like your sitting at your Grandmother's kitchen table all over again.

This is a very simple recipe for cherry pie.  I used frozen sweet pitted cherries, but I've heard that the sour ones are good too!  If using frozen cherries, be sure to let them sit in the bowl with sugar and cornstarch long enough to defrost a bit before pouring them onto the crust and into the oven.

I used refrigerated pie crust for this recipe, like I always do.  (I've decided I'm not going to attempt the homemade stuff until I get a food processer.)  You don't have to make it a lattice crust on top, but I really like the old fashioned look of it on such a traditional pie. The crimson color of the berries look so pretty after it's baked and oozing out from the crust!  Yummy!!

To make the crust look extra golden, I always do a milk or egg wash and then generously sprinkle sugar on the top. (You can read more about an egg wash in Nana's loved Apple Pie recipe.)  This pie is irresistible!  We had some delicious sugary cherry juice in the pan once cut, so we spooned it over vanilla ice cream!  It was over the top good! I really do hope that you try this super simple sugar laced cherry pie.


Cherry Pie

1 1/4 c. granulated sugar
3 Tablespoons cornstarch
5 1/2 cups (about 2 bags) fresh or frozen pitted cherries
2 roll out refrigerator pie crusts


In a large bowl, stir together the sugar and cornstarch.  Add cherries.  Gently toss until coated well.  Let mixture stand for about 15 minutes, or until a syrup forms, stirring ocassionally.  (If using frozen cherries, let stand for about 45 minutes. Until cherries are partially thawed but still icy.)

Meanwhile roll our your bottom pie crust and lay it out in the pan. Stir the cherry mixture and tranfer to the pasty-lined pie plate.  If you are going to make a lattice top, do so now.  If not, put your top crust on and make a few slits in it  to allow the steam from the cherry mixture to release.  Seal and crimp the edges of the pie.  If desired, put on your milk or egg wash and sprinkle with sugar.

Bake pie on the rack about a sheet pan in case of spillage.  To prevent over browning, cover edges of pie with foil.  Bake in a 375 degree oven for 30 minutes (or 50 min. if using frozen berries).  Remove foil and bake for an additional 25-30 minutes until center is bubbly and pastry is golden.  Cool for at least 2 hours for it to set well.  Enjoy!

Monday, August 2, 2010

Peak of Perfection Strawberry Jam


"With jam and bread, with jam and bread!"  Maria sings out with the children during the climax of "Do Re Mi" in one of my favorite movies of all time, "The Sound of Music".  Yes, I'm a bit obsessed with musicals and at times burst into song--a lot, actually.  What better to sing about then homemade sweet strawberry jam that has been freshly preserved in your own kitchen?  What's not to love about the beautiful jewel toned color of the ripest crushed strawberries that are cooked down with sugar until it becomes the lovliest jam to have ever been spread on a hot biscuit or flakey croissant?!  No wonder it's such a favorite not only in my home, but in about every Southern kitchen alike!  This strawberry jam recipe is simple but  perfectly sweet and one anybody would love to receive as a gift with some freshly baked bread...just as Maria sings about!


This was actually the first time I attempted to make jam, and I was fully prepared to fail on the first try. This summer I've been blessed to be able to take a break from work, so I decided set aside the time to do this old fashioned tradition of (made from scratch) canning; and I was very pleasantly surprised.   This recipe comes from my good 'ole faithful Better Homes and Gardens cookbook that my mom gave me when I got married, and if you follow the direction I think it's no-fail.  So, if you find the time to make this deliciously summer jam I hope that you try this recipe and share with others.  Get ready to make a lot, because it will be best loved!  Strawberry jam will surely be a new tradition in my home every summer!

A few tips:
* First, I did a rough chop on the (peak of perfection-ripe) strawberries.  The recipe doesn't say to do this, but it made the mashing easier for me. Unless, of course you have tiny ripe strawberries.Then you can take a potato masher or pastry blender and crush the strawberries.
*I really timed the cooking as it says so that it would not be too thick.  Don't worry if it seems too runny while pouring into the jars, because the jam will thicken as it cools.
*I made sure that my jars were very thoroughly sterlized in the boiling water and completely immersed.  Lids, as well.  I was so happy to quickly hear each one of the "pops" that come from the jar's lids sealing into place.  It was so rewarding that I think I actually jumped up and down!  Like I said I didn't think my first batch would turn out, but I think
the Lord helped me out.

Strawberry Jam
2 Quarts fresh strawberries, hulled
1- 1 3/4 oz. package of regular powdered fruit pectin
1/2 tsp.butter (this just helps minimize the foam--can't taste it)
7 c. sugar

Place 1 cup of berries in an 8 quart heavy kettle.  Crush berries (see picture).  Continue adding berries and crushing until you have 5 cups of crushed berries.  Stir in pectin and butter.  Heat on high, stirring constantly, until mixture comes to a full rolling boil (see picture). Add sugar all at once.  Return to boiling; boil one minute, stirring constantly. Remove from heat; quickly skim off foam with a metal spoon.  Ladle into hot, sterilized half pint canning jars, leaving a 1/4 in. headspace.  Wipe jar rims; adjust lids.  Process in a boiling water canner for 5 minutes (start timing when water returns to boil).  Remove jars; and wait to hear the seal "pop" into place. Tighten the lids all the way, and cool on racks.

Thursday, July 8, 2010

Mama's Banana Split Pie


   Happy Independence Day!  It's not too late to say that, right?  I thank God everyday for the freedoms that we have in America!  I've been inspired to share a couple of summer treats with you in celebration of the Fourth of July! This one is particular is definitely one of the best summer traditions in my family.  Every Fourth, my mom makes this fabulous Banana Split Pie that everybody looks forward to eating!  So much for the BBQ and fried chicken, give me the pie!!!

   It consists of  the tropical flavors of the season!  The pineapple and bananas are the stars of this pie, but put that on top of a homemade graham cracker crust, with a dreamy creamy filling, and whipped cream and toasted pecans....and....well, it's just mouth-watering good!  We always decorate it like a flag on the Fourth of July, with fresh strawberries and blueberries which makes it a festive centerpiece for the dessert table.  Otherwise, we sprinkle on the toasted pecans and marachino cherries for a true banana spit finish. Remember, if you make this into a flag, you will need to use a 9x13 pan and double the recipe. It will serve several people this way, too. This is actually an easy recipe that looks and tastes like SO much more!  You have to try this cool dessert on a hot summers day or share in our tradition and make it in celebration of our America the beautiful!


Banana Split Pie


The Crust:
Crushed graham crackers
2 tsp. sugar
1/2 c. melted butter

Stir all together.   Spread out in a 8" pie pan and press down on the bottom to make an even layer.  No baking is required. (Add as much sugar as you like, or don't add any if you are want.  I believe I usually use about half the box of pre-crushed graham crackers for a 8"pan. )

2 eggs
2c. powdered sugar
1/2 c. butter (1stick)  softened, not melted
15 1/4 oz. can crushed pineapple, drained well
2-3 bananas
4 1/2oz. Cool Whip*
1/4. chopped pecans, toasted
Marachino Cherries or blueberries and strawberries

Beat first 3 ingredients until light and fluffy.  Spread evenly over the graham cracker crust. Drain the pineapple and spread over the filling evenly.  Layer with sliced bananas.  Top with the Cool Whip, nuts and cherries.  If you are making a flag top, use the blueberries where the stars would be and the strawberries for the stripes.  Evenly sprinkle the nuts all around.

Chill for at least 2 hours.  (Do not put in the freezer.  I've made that mistake and it's not a good one!)  Enjoy!!


*We have always used Cool Whip for this recipe, although you can certainly make homemade whipped cream for the top, but eat it soon afterward.  I don't think homemade whipped cream  is as good after it sits for a while.